Translator

Français/French Deutsch/German Italiano/Italian Português/Portuguese Español/Spanish 日本語/Japanese 한국어/Korean 中文(简体)/Chinese
Simplified
Select Language:

Merry X-mas & Happy New Year


Faith makes all things possible.
Hope makes all things work.
Love makes all things beautiful.

For this Christmas, 
may you and loved ones have all the three.

MERRY CHRISTMAS & HAPPY NEW YEAR


  • Digg
  • Del.icio.us
  • StumbleUpon
  • Reddit
  • RSS
Read Comments

Handmade Wire Jewelry ~ Coiled Filigree Earrings (Custom Order)

28th November 2013 (Thursday) @ 1.30pm

A pair of  custom made coiled filigree earrings crafted in silver plated artistic wire 
and Swarovski white pearls.  Diameter of the earrings is much smaller than my original design, more filigree coils and pearls.


Thanks for looking!


  • Digg
  • Del.icio.us
  • StumbleUpon
  • Reddit
  • RSS
Read Comments

Handmade Wire Jewelry ~ Wire Wrapped Double-layer Flower Ear Studs


25th November 2013 (Monday) @ 8.05pm

Three pairs of custom made wire wrapped double-layer flower ear studs. 
 2 pairs with swarovski pearls and 1 pair with swarovski crystal montees, all crafted with anti-tarnish silver plated artistic wire, imported from USA.


Please forward all inquiries to emilytanmeisin@yahoo.com

Thanks for looking !  XD

  • Digg
  • Del.icio.us
  • StumbleUpon
  • Reddit
  • RSS
Read Comments

Handmade Wire Jewelry ~ Wire Wrapped Kelly Grace Ear Hoops

23rd November 2013 (Saturday) @ 9.54am

A custom made pair of simple Kelly Grace ear hoops for Frances.  


Tutorial for the swirly loops earrings (2 in 1 tutorial - Lotus Tiara & Kelly Grace Head Band) can be purchased by emailing me at emilytanmeisin@yahoo.com

Thank you for dropping by!  XD

  • Digg
  • Del.icio.us
  • StumbleUpon
  • Reddit
  • RSS
Read Comments

Crochet Beaded Rope Necklace/Bracelet

12th November 2013 (Tuesday) @ 9.15pm

CROCHET BEADED ROPE NECKLACE/BRACELET
(DESIGN A - GEOMETRIC)


This will be a custom order item.

This crochet beaded rope can be made into a choker, short/long necklace, lariat,
 or  a bracelet (single or multi-strand)

Thousands of seed beads were individually strung into cotton thread according to the number of beads and it's sequence, and then crocheted into a circle, row by row until the desired length is required.  It is lightweight and comfortable to wear.  This rope is finished off with a toggle clasp and beaded end caps with Swarovski pearl.  

If you're interested in this item, do email me for further info/details.

  • Digg
  • Del.icio.us
  • StumbleUpon
  • Reddit
  • RSS
Read Comments

New Wirework Jewelry Tutorial ~ Lotus Tiara & Kelly Grace Head Band

7th November 2013 (Thursday) @ 10.26pm


STEP BY STEP 2 IN 1 WIREWORK JEWELRY TUTORIAL
LOTUS TIARA & KELLY GRACE HEAD BAND 
(CODE:   ESP 4/2013)


LOTUS TIARA


KELLY GRACE HEAD BAND 


EXAMPLE OF A PAIR OF EARRINGS USING KELLY GRACE HEAD BAND 
WIRE WRAPPING TECHNIQUE.

FILE SIZE:  3.26MB
MORE THAN 90 STEP BY STEP PHOTOGRAPHS 
AND INSTRUCTIONS.

PRICE:  US 5
PAYMENT VIA PAYPAL

To purchase, please visit www.etsy.com/shop/emilysecretpassions or email me at emilytanmeisin@yahoo.com

Thank you! 


  • Digg
  • Del.icio.us
  • StumbleUpon
  • Reddit
  • RSS
Read Comments

Deepavali Greetings

1st November 2013, Friday @ 9.20pm


MAY THIS FESTIVE SEASON BRING YOU 

JOY
PEACE
PROSPERITY
HAPPINESS
&
GOOD HEALTH

HAPPY DIWALI!


  • Digg
  • Del.icio.us
  • StumbleUpon
  • Reddit
  • RSS
Read Comments

Crochet Beaded Rope Patterns


1st November 2013 (Friday) @ 9.09pm

Hi ..... My apologies for not updating this blog often.   My creative juice has not been flowing smoothly so I kept away from doing wire jewelry.  Instead, I tried my hands with trying out the patterns for crochet beaded rope.   Patterns are aplenty and you can go crazy selecting them.   Here are a few photos to share with you of what I did.


Custom order - Mobile hangings with pewter charms, done for a teacher as a gift for her students.


These are a few of the patterns I tried out using whatever seed beads that I have in my stash.  I will usually use the normal glass seed beads to practice on the pattern just to see how they look after completion and will only use the high quality ones, once I decide on the pattern for my jewelry.  

The seed beads are first strung into the cotton thread a few at a time with needle attached to the thread.  A bead spinner is not used here as it involves the beads to be strung in a particular order according to it's colour and quantity.  If you are using one colour seed beads, then the bead spinner is useful.  Anyway, I don't own a bead spinner!   =)


Crochet Beaded Rope Bracelet done with size 11 seed beads in 2 colours.


As you can see from this photo, I did not use shop bought metal findings for the end caps but instead covered it with beaded end caps that I made myself.  Often when crafting, it is hard to find just the right way to finish a piece to suitably compliment the effort I have taken.  I can use these end caps to finish a necklace or bracelet  or some other things that need the use of end caps.    


A simple design beaded rope worn as double strand bracelet.


Alright!  It's about all I can share for the time being.  
Until then, take care and have a pleasant and wonderful weekend.


  • Digg
  • Del.icio.us
  • StumbleUpon
  • Reddit
  • RSS
Read Comments

1st Attempt at Decoupage

29th September 2013 (Sunday) @ 8.57pm

Hi there!  I know I've been away for a while now.  And I have not been active doing wirework jewely as well, as my eye sight is not what it used to be a few years ago.  I will not totally give up doing wire jewelry, though, just that it will not be as often as before.

Just to share with you what I did for the past few weeks ...... from sourcing for the materials to the completed item.  This is my first attempt at Decoupage.  Firstly, I had to source for the paper napkins, mod podge, ceramic tiles (which I had to search from one tile shop to another to find the correct piece), etc.  


This is the end result ..... decoupage on a ceramic tile (as a coaster).  I had the flowers cut from the napkins, glue them on with mod podge and waited them to dry in between coats, glued felt padding on the bottom but they stucked together when I piled them up on each other so much so that the felt padding stuck on the tiles and had some of the fibres on it too.  I wonder what went wrong with it ....


This one is done on a rock with the image and words printed with my Canon printer.


And this one has egg shells glued on the bottle before I glued the flower paper.   Doesn't look very nice as I should have painted the bottle with another colour before applying the egg shells.  

Anyway, I am just experimenting decoupage with the above materials.  Let's see if I'll make another attempt as I still have some paper napkins left. 

Thanks for reading!

Until then,  take care and have a wonderful week ahead!


  • Digg
  • Del.icio.us
  • StumbleUpon
  • Reddit
  • RSS
Read Comments

Handpainted Stones ~ Custom Order

21st September 2013 (Saturday) @ 6.58am


Handpainted stone - Custom Order


Thanks for viewing! 

Have a wonderful weekend! 

  • Digg
  • Del.icio.us
  • StumbleUpon
  • Reddit
  • RSS
Read Comments

Handmade Wire Jewelry ~ Kelly Grace Wire Wrapped Beaded Headband/Headpiece

9th September 2013 (Monday) @ 8.06pm

100% HANDCRAFTED 
KELLY GRACE HEADBAND/HEADPIECE

Remember this headband which I posted previously?  


I didn't like the look of it because it's too simple and bare, so I added small pearls and seed beads along the sides of the headband and it looks like this ...
It looks definitely much better with the beads!  


Do email me if you have any inquiries on the headband 
or if you want a piece made for you.  

Thanks for looking!


  • Digg
  • Del.icio.us
  • StumbleUpon
  • Reddit
  • RSS
Read Comments

Happy 56th Birthday, Malaysia!

30th August 2013 (Friday)


HAPPY 56th BIRTHDAY, MALAYSIA!


Let's put our hearts together and raise our country's flag to celebrate this meaningful event.  Salute to our national flag, the Jalur Gemilang, to everything it represents.

I'm proud to be a MALAYSIAN!


Wishing all Malaysians
 a joyous and harmonious 56th Merdeka day!  


  • Digg
  • Del.icio.us
  • StumbleUpon
  • Reddit
  • RSS
Read Comments

What Have I Been Doing Lately?

30th August 2013 (Friday) @ 10.00am

This is what I've been doing! 
 Trying out making a head/hair band with swirls and pure wire wrapping technique.  


This hair/head band is 100% handcrafted with anti-tarnish gold tone plated artistic wire.
Leave it plain or embellish it with bead.  
 I'm gonna embellish it with beads and update the photos later on.  


I even made a pair of ear hoops with it.


 And later , I wrapped it with turquoise beads and 
red swarovski bicone crystals.


So, what do you think of it? 
 I haven't decided on the name for these hoops.  
Any suggestions?


  • Digg
  • Del.icio.us
  • StumbleUpon
  • Reddit
  • RSS
Read Comments

Incomplete Projects ~ Bead Weaving and Bead Embroidery

29th August 2013 (Thursday) @ 8.54pm

Hi there!  I'm back!  
This time I'm sharing with you a couple of photos of incomplete projects which I did some time ago but did not get to complete it due to other distractions.  I "dug" it out from my "Incomplete Project" box and decided to share it here, until I have something new to update.  


Two teardrop cabochons with peyote stitch techniques and
 a bead crochet rope waiting for it's turn to be done.


A bead embroidered pendant (prototype) using seed beads, gemstone chips
 and an oblong bead as the focal.  I bead embroidered it around a felt and
 finished it off using picot stitch for the edging.

Gonna put all three back into the box until I can find some time to complete them.  Now, I've got other things to do ....... Until then, take care!


  • Digg
  • Del.icio.us
  • StumbleUpon
  • Reddit
  • RSS
Read Comments

RELEASED OF NEW TUTORIAL ~ JASPERINA FILIGREE PENDANT

12th August, 2013 (Monday) at 10.00pm


STEP BY STEP WIRE JEWELRY TUTORIAL

 ~ JASPERINA FILIGREE PENDANT ~


Price:  USD 6
Payment via Paypal

Available as instant download in printable PDF format

Available at my Etsy shop

and 

Craftsy Pattern Store 


  • Digg
  • Del.icio.us
  • StumbleUpon
  • Reddit
  • RSS
Read Comments

My free tutorials featured in Beading Gem's Journal

11th August 2013 (Sunday) @ 8.51pm

Hello again .......

Wow!  Looks like I'm in a habit of not updating my blog again.  It's the school semester break again, this time for 2 weeks which includes the public holidays for Hari Raya festival as well.  Although I do not have to send and fetch the children to and from school, I still have other commitments. The children have their own agendas as well.   As usual, I don't take a break by going for holidays but stayed at home instead.  The thought of having to drive and get stuck  with thousands of cars on highways during this period is a trying time and a waste of time just to get to our intended destination.  

 I have not been crafting, too, as I am busy writing wirework jewelry tutorials and still in the midst of taking the step-by-step photos.  

Anyway, here's just for sharing ........

My free tutorial on easy wire wrapped studs earring has been featured by Ms Pearl of  The Beading Gem's Journal recently.  The link is at http://www.beadinggem.com/2013/08/easy-wire-wrapped-stud-earrings.html 


  She also mentioned on another free tutorial ~  my Adjustable Wire Wrapped Ring which you can find at http://emilysecretpassions.blogspot.com/2011/06/free-tutorial-wire-wrapped-beaded.html.

You can also find another recent tutorial ~ Twisted Wire Beaded Cross Pendant at http://emilysecretpassions.blogspot.com/2013/07/free-tutorial-twisted-wire-beaded-cross.html 

I hope anyone that comes across the above will try out the projects.  If you have any problems pertaining to the tutorial,  please email me at emilytanmeisin@yahoo.com.

Thank you for reading this. 
 Gotta stop here for now. 
 Till then, have a wonderful and productive week ahead 
and lastly, happy crafting! :D


  • Digg
  • Del.icio.us
  • StumbleUpon
  • Reddit
  • RSS
Read Comments

SELAMAT HARI RAYA AIDILFITRI

6th August 2013 (Wednesday) @ 2.59 pm

HARI RAYA AIDILFITRI is just around the corner and it is inevitable that the highways will see the annual balik kampung with the mass exodus of Klang Valley folks heading for their hometowns.    Some of them will be using public transport while others will do so in their own vehicles.  Those travelling in their own cars should ensure that their vehicles are in tip-top condition so that they will not encounter any problems during the long journey. 

 Have a pleasant and safe journey!

To all my fellow Muslims, 
Selamat Hari Raya Aidilfitri 
and to all my fellow Malaysians, 
have a happy and joyous holiday.  

x0x0x0x0

  • Digg
  • Del.icio.us
  • StumbleUpon
  • Reddit
  • RSS
Read Comments

RELEASE OF NEW TUTORIAL ~ DAISY LACE EAR STUDS


26th July 2013 (Friday) @ 8.07pm


Daisy Lace Ear Studs Tutorial 
(Design by Emily Tan)

Price:  USD 5
(Payment via PAYPAL)

This printable PDF format document which is for a beginner to intermediate level, consists of 13 pages and more than 40 step-by-step photos with instructions.  File size is 1.79MB.

This tutorial is available now as instant download at 
and 

If you have any enquiries pertaining to the above tutorial,  please email me at emilytanmeisin@yahoo.com


  • Digg
  • Del.icio.us
  • StumbleUpon
  • Reddit
  • RSS
Read Comments

Free Tutorial ~ Twisted Wire Beaded Cross Pendant

23rd July 2013 (Tuesday) @ 8.52pm

Hello!  I'm sharing here, a tutorial on how to make a Twisted Wire Beaded Cross Pendant.  
It's a simple pendant using a length of wire, some seed beads and basic twisting technique.  You need to have basic knowledge of wire twisting and wire wrapping techniques, and the fun part is that it will only take you about 10 - 15 minutes to complete. 

TWISTED WIRE BEADED CROSS PENDANT


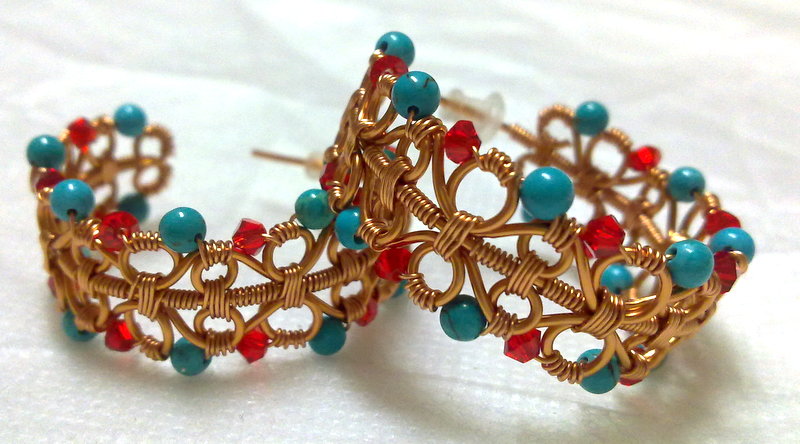
 A pair of Twisted Wire Beaded Cross Earrings made in a smaller version.

Ok, let's get started ...............


1.  MATERIALS & TOOLS NEEDED FOR THIS PROJECT:
(Pendant size ~  Approximately 3cm x 5.5cm)

22g wire
11/0 size seed beads of your choice
Wire cutter
Round nose plier
Flat nose/bend nose plier
Nylon jaw plier (optional)
Ruler


2.  Cut a length of 22g wire, measuring 24cm long.
Straighten/smoothen it with nylon jaw plier.


3.  Bend/fold the wire in half and leave a little space as shown.


4.  Insert the seed beads into one of the wires until it is about 2.5cm long.  I've inserted 13 seed beads here.  If you want it to be longer, then add a few more.  


5.  Twist both wires together & secure the twisted length of beads (I have 15 seed beads on this twisted wire) by twisting the wire once at the top.  You can use your fingers or the nylon jaw plier to twist but do not put too much pressure as you may break the seed beads.  


6.  Spread out both wires ~  one to the left & the other to the right, as shown. 
 Insert 7 beads.   


7.  Next, bend/fold down the wire just after the seed beads as shown.


8.  Again, twist both wires simultaneously with your fingers or nylon jaw plier.
 Be careful not to break the seed beads.


9.  Repeat the same for the other side.
  It doesn't matter which side you do first.  Bring the two straight wires
 to meet in the centre and bend them upwards.  


10.  Again, insert 7 seed beads into one of the wires and twist both together.


 11.  Secure the beads with 2 wraps to the top and trim excess wire.


12.  Make a wrap loop with the other wire and you're done.  


Voila! 
 You've completed a simple pendant which can be worn with 
your favourite chain or cord.  

NB:  The photos were taken with my Nokia N97 and these are the best shots that I've selected.  


  • Digg
  • Del.icio.us
  • StumbleUpon
  • Reddit
  • RSS
Read Comments